
It’s Friday afternoon and another Friday Night Lights is upon us. Today we will be taking a look at a firearm and seeing what it takes to set it up for low light and or night vision. The gun, if you could not tell by now from the title and featured image, is the Springfield Armory Hellion. This article will show you different options for setting up your Hellion of the night.
Springfield Armory @ TFB:
Hellion Of The Night: Let There Be Light!
The Springfield Armory Hellion is a cool gun. When it came out I had to get my hands on one. Thanks to Adam S. and Springfield Armory for lending this one to me. Besides being a pretty stellar mil-spec rifle, it is a unique design and has some challenges setting it up for the night. Adding lights to your Hellion of the night seems straightforward at first but it can be tricky if you want to set up it a certain way.
I went with a Modlite/Weltool for a primary white light. However, since the handguard is rather short, I found mounting the light directly to the handguard cost me some room for my support hand.
I used a Magpul cantilever rail to bolt the Modlite body and then the mount attaches to the M-LOK slots in the Hellion of the night handguard.

The Magpul cantilever mount positions the light further forward leaving plenty of room for my support hand. I can press the tail cap with my thumb to activate the light.

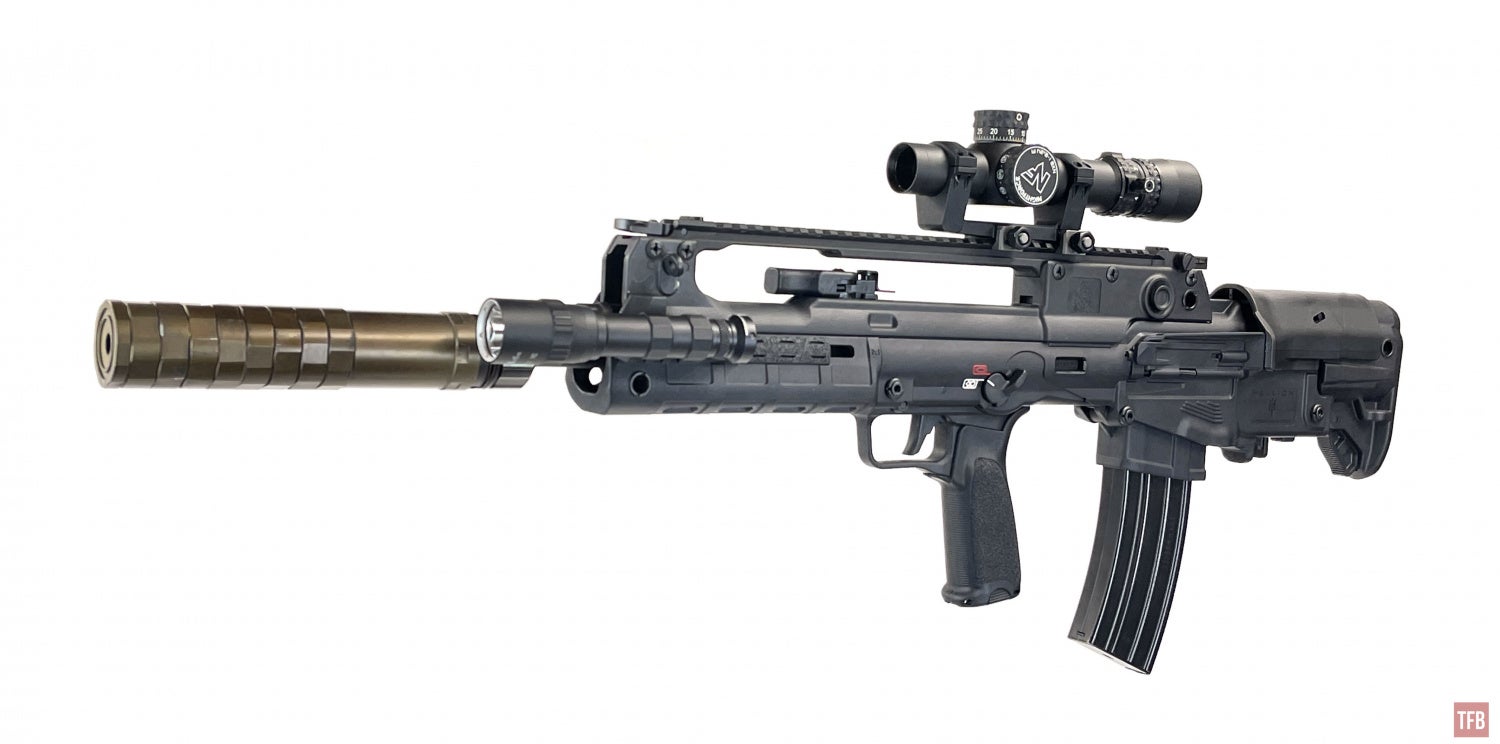
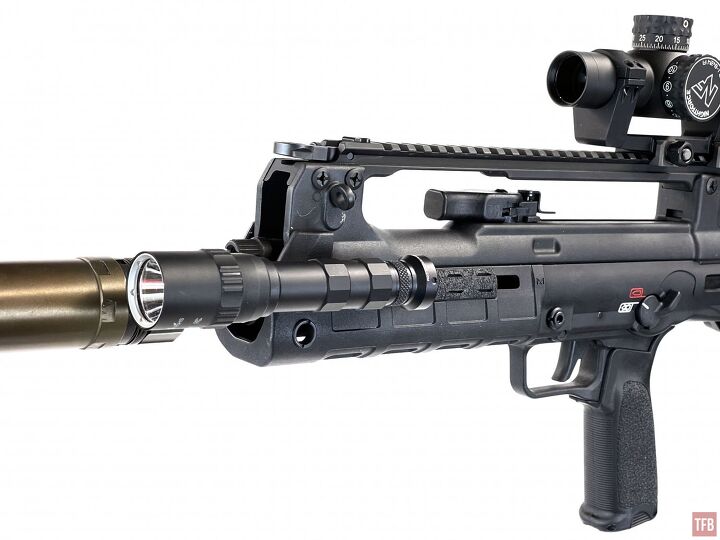
Another option is the Magpul extended cantilever mount for SureFire Scout Lights, just not the Dual Fuel M600DF light body. I prefer this setup since it positions the head of the Scout Light past the muzzle brake. Plus it takes up less space on the handguard. See how the tail cap is lined up with the sling mount above it? The other cantilever mount does not push the light that far forward.


The Hellion of the night handguard has some protrusions and the Magpul extended cantilever mount clears them just fine.


If you want a more simple setup, you can go with a Reptilia Corp Torch body. They are offset and mount directly to M-LOK. You need to choose which side the offset mount sits on. The one I have is for mounting the light on the right-hand side of a traditional AR and it elevates the light higher than the M-LOK slots. While the Hellion handguard has M-LOK slots, they are slightly recessed and are angled. This does not work if I try to mount this Torch body on the right side.
You can see in the photos below, the handguard touches the side of the light body and I have not seated it all the way down yet.

See the gap between the Torch mount and the handguard?

However, if you flip the Reptilia Torch to the left side, it clears the handguard. Even though the light is further back than the setups I showed above, there is still room for my hand to fit behind the light and not touch the charging handle.

See? Nothing touching the body or handguard here other than the mount.


Sometimes Old School Still Works
One minor issue with the Hellion of the night weapon light setups above is that they are not conducive for ambidextrous use. If I switch shoulders and shoot the Hellion of the night left-handed, then I cannot easily activate those lights. So I tried my old SureFire M900 vertical weapon light. The M900 has ambidextrous tape switches on either side of the vertical grip battery compartment.


Lasers For Your Hellion Of The Night
Here is where accessorizing the Helion of the night can become challenging. Just because you can slap something on a Picatinny rail doesn’t mean it is the best or optimized for use. I put my PEQ-15 on the top rail. Fortunately, the Nightforce LPVO sits high enough that the PEQ-15 does not obscure my sight picture.

Luckily, the front backup iron sight does not obscure the laser.

The Hellion has a front sight deploying button that sits proud above the top of the Picatinny rail. So if you position the PEQ-15 far forward enough, it will sit on the release button and cause the back up front iron sight to always be deployed.

So what is the problem here? The carry handle is between the handguard and PEQ-15. See how much my support hand thumb has to reach up and over to press the activation button of the PEQ-15? It is a stretch and I have medium-sized hands. This is not ergonomic at all.

So what can you do? Well, so far the right-hand side of the handguard is open on your Hellion of the night. The three M-LOK slots is the perfect length for a Unity Tactical TAPS switch. The cables are long enough to reach the back of the PEQ-15 without interfering with access to the charging handle. It is not ideal but it works. I can activate both the light and laser with that overly built tape switch.

There does not seem to be a good way to organize the wires so you have to accept it and pay attention to them so they do not snag on anything.

But wait, why can’t you mount a laser to the 9 o’clock position on the handguard?
Easier said than done on the Hellion of the night. Since the handguard is tapered, the M-LOK slots are not parallel to each other. If you mount a laser to a rail, it will sit at an angle. See the photo below. While this is functional, it causes your adjustments to the laser to not be straight up and down making it harder to zero.

Another problem is activating the laser. Luckily, you can get a ModButton Lite and mount it behind the laser. This is more complicated if you use an ATPIAL/PEQ-15 since the battery cap is in the back of the unit and the tape switch can block it.

Clip-Ons For Hellion Of The Night
Passive aiming with the Hellion of the night is actually rather easy since the carry handle sits so high above the cheek rest. I am able to see through the Nightforce LPVO with my helmet-worn goggles. Of course, you can put any low mount red dot and be able to aim passively with night vision on the Hellion.
Since the carry handle is so long, there is plenty of room for a night vision or thermal clip-on even with an LPVO mounted. Below I have mounted a Trijicon OASYS UTCXII thermal clip-on for long-range shooting.


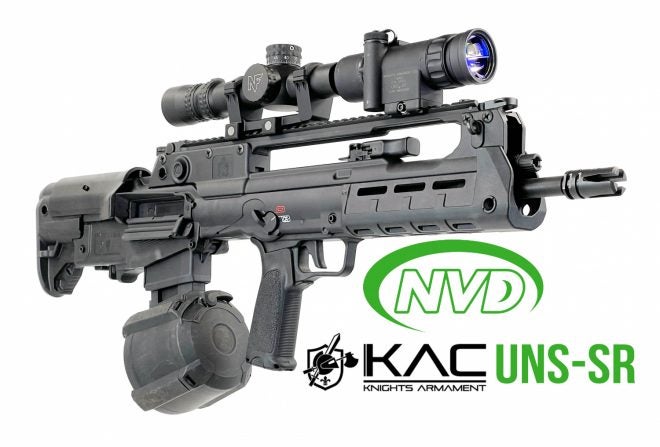
For more traditional nighttime use, a clip-on night vision device can work. I had posted about the KAC UNS®SR and the Black Optex CNVD.

But if you have a normal night vision clip-on, there is room for it to sit on the rail. Here is my PVS-27 on the Hellion of the night.


Final Thoughts On The Hellion of the Night
The Hellion is a cool rifle even though it has some odd controls. The form factor is a bit odd when trying to add lights and lasers to it. Also, a big factor for me is to have simultaneous control of light and laser or at least be able to activate them on command. I do not want to have to move my hand to the top to turn on a laser, come back to the handguard and activate a light. Then repeat the process to turn off the laser. Light and laser discipline is a skill people should practice and plan for when setting up their guns for nighttime use. You do not leave a light or laser turned on while you are moving or performing an administrative task. A light is pretty easy with the options I mentioned above. It is just ambidextrous use that becomes challenging. I could have used a DS07 tail cap so I have the button and remote tape switch port. Then I could run a tape switch to the right side of the handguard but I could still activate the light by pressing the tail cap button with my left hand thumb. But if I had to switch shoulders I could activate the light with the tape switch on the right side of the handguard.
Lasers are a bit more complicated since mounting them makes it awkward for activating them without a tape switch. Another issue is wire management. You need decent length cables to reach the laser which means you will have wires exposed.
The Clip-On method of shooting at night is the easiest but cost-prohibitive and they are heavy, except for the KAC UNS®SR. You are spending a few thousand up to 10s of thousands of dollars depending on the clip-on you choose.
Hopefully, this article may inspire you to set up your Hellion of the night.
We are committed to finding, researching, and recommending the best products. We earn commissions from purchases you make using the retail links in our product reviews. Learn more about how this works.
Credit: Source link

